Sunday, 6 November 2016

Drilling Holes in our new roof...Eeek!

Now I know to a lot of folk, drilling and tapping a hole is no big deal...  in fact, to me usually that's the case too.

WHEN it's through the roof of your new boat however, it just seemed "wrong".

A necessary evil of course in order to fit the solar panel mounts that kind chap sent me - for which I've STILL not paid... despite chasing him up twice now!

Having gathered together my bits and bobs, I fitted the brackets to a panel and dragged one on the roof to mark out their final locations.

You may remember all the fuss about the location of the bathroom mushroom vent which ended up in the way and HAD been changed to a flat "space ship" type... well, in the end, due to the last minute rush to meet the shared lift deadline, we did end up with a normal mushroom.  LUCKILY though, the solar panel bracket has enough height in it to allow the panel to sit over the vent comfortably.

I planned on using 6mm stainless steel bolts to hold them down and used a slight larger drill bit than I'd  usually use, so as to be able to get a decent amount of Sikaflex http://www.screwfix.com/p/sika-sikaflex-ebt-all-weather-sealant-black-300ml/79299?kpid=79299&cm_mmc=Google-_-Product%20Listing%20Ads-_-Sales%20Tracking-_-sales%20tracking%20url&gclid=COP877i7k9ACFRAz0wodT5kP0g down through the threads.


Given we really should have painted under the bracket properly once i'd got plenty in the hole, I then proceeded to put big dollops under the entire surface.  I don't think it will leak as once the stuff sets, it's pretty hard to penetrate.  I do wish I'd bought a better quality tap and dye set though as by the time I'd done all 12 holes, the m6 tap was about worn out.  In fact, the last one I did was a pretty poor fit and I may need to drill it out and use a larger bolt at some point in the future.  

Having got the panels in place I needed to work out the best route for the wires into the cabin.  I know a lot of people use a mushroom vent but given we'd already had the internal wires run behind the panelling, going through the front bulkhead into the back of the wardrobe was the best choice.  I drilled 2 x 12mm holes through and whilst I'd initially planned on using some little rubber grommets to protect the cable, decided after consulting a few other folk, to wrap a good amount of self amalgamating tape around each wire to make a snug fit through the hole and leave an inch either side to allow for movement WITH the steel if you follow.  It's double insulated cable to start with so I should think it would withstand quite a lot of rubbing even without additional protection.

On the inside, I fitted a box to join the wires together and a pvc plate to over the holes. 

As you can see, there's going to be a lot going on in this corner as it's where the 3 tv cables, 2 satellite and 1 radio cable all terminate - my plan is to try to attach them all to 1 aerial (with a booster) and fit this to the front of the boat.  Time will tell if that works out!

What only takes a few mins to write down, took all day - partly because I'm the worlds most messy worker, leaving my tools laying around the boat and spending half my time asking Andy "have you seen such and such?"... I WILL have to learn to work in a more tidy and disciplined manner as it's beginning to frustrate even me!

Once the panels were safely terminated, I went to the front of the boat and began the connections to the battery bank.  I wasn't sure what size fuse to be using so once again asked advice from Thunderboaters, and a compromise was agreed - we ended up with a 70amp in-line fuse.  The theoretical max output of the mppt controller is 40amp and the cable I've used is 16mm2 (jump leads).  

There isn't much space to squeeze a 5ft 10 ginger in the engine hole but trust me once in there, it was very handy to have my glamorous assistant passing me things I'd forgotten to take in with me.


On the plus side, as it was very cold out, I was quite pleased to have had the engine running for a couple of hours earlier to make working in there more pleasant. 

Having made the connections to the battery, I mounted the controller as close as possible to minimise the length of cable required - I think in the end, it's worked out about 3/4 of a metre which isn't too bad.

After the unit was on the wall I connected the battery FIRST - very important or you can break the controller!!! and then wired in the panels followed finally by inserting the fuse in the engine hole.  Next, I cut of a hole in the control panel and fitted the remote meter I bought at the same tie to monitor the mppt.  I'm pleased to report that even in late afternoon  winter sun, it was managing  a
10.4amp charge rate.   It soon dropped though as the batteries were quite close to full.  

I know given the time of year,  we won't get a tremendous amount from them, but given we'll not be living on board yet, they SHOULD keep the batteries in good condition and reduce the amount of time we'll have to run the engine..,

In other news, I spoke with Simon (the Webasto man) the other day and whilst he confirmed our kit has arrived, he's a bit tied up and unable to come fit it for a few weeks. That's a bit of a shame but we'll manage by using a combination of a camping gas stove and (with the engine running) the little halogen heater to take the chill off the coldest part of the days.  After today, we're both back at work full time anyway so it will only really be weekends and the odd couple of hours after work for me in the dark.

Until next time...


Friday, 4 November 2016

Radiators and piping.

Good morning - please ignore the time... "insomnia o'clock again"...

I THOUGHT that once the boat was under our jurisdiction, I'd be able to sleep... well it turns out that is not the case.  Oh well.  At least I'm not wasting my time in the middle of the night... no - not me.  I've been researching funeral costs (triggered by a program I've just watched on the telly) and have also been watching a program about Britain's Bridges... it was very good!

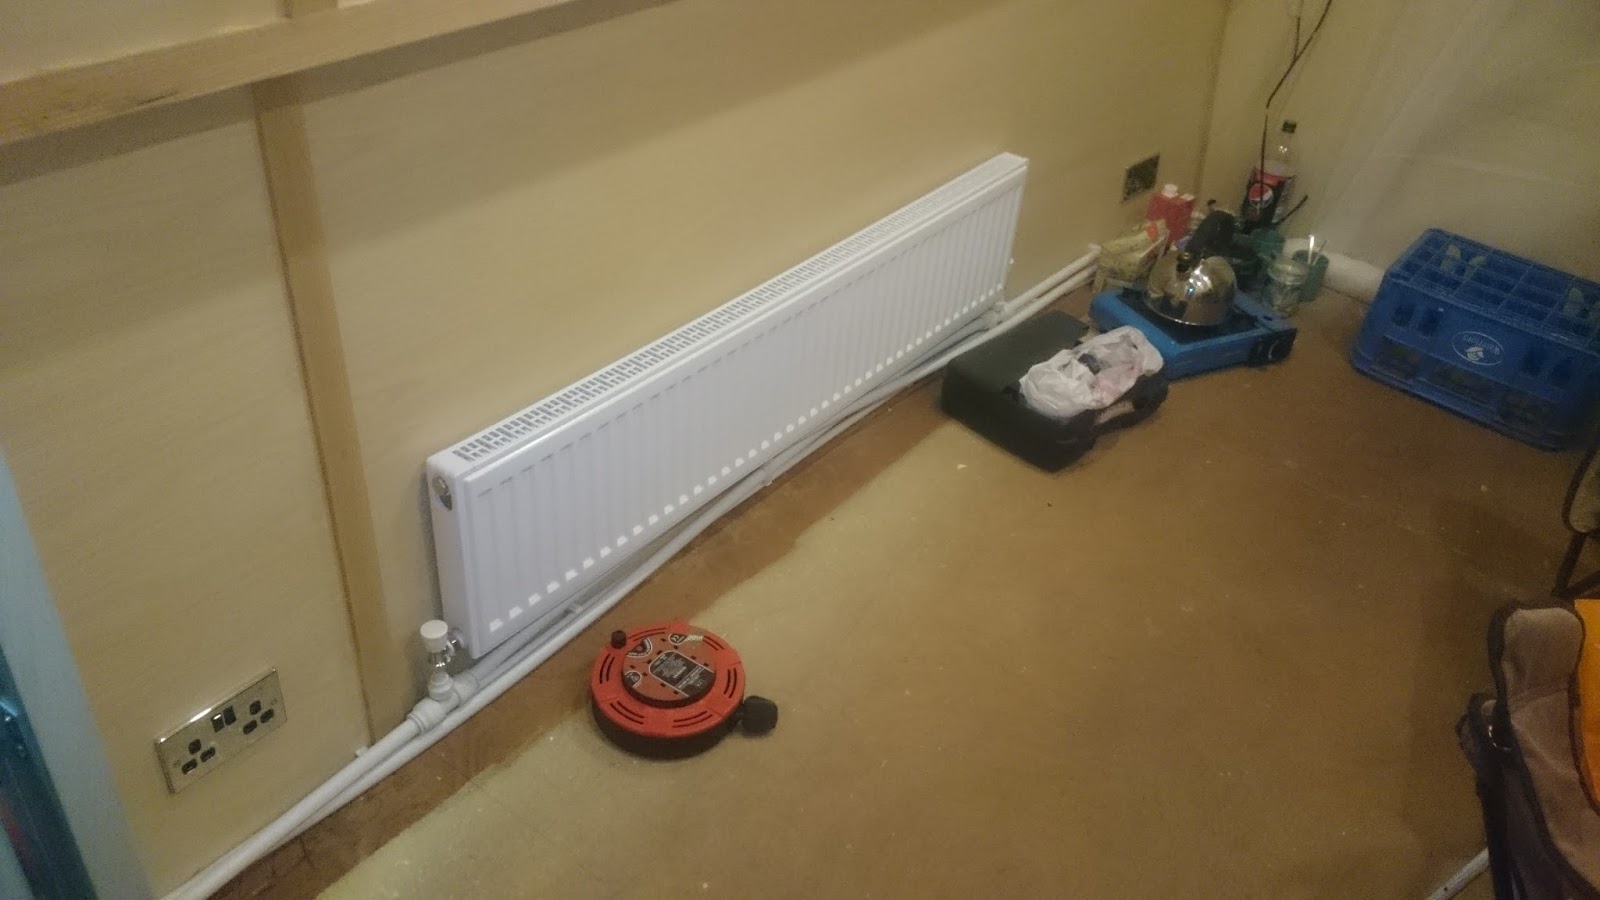
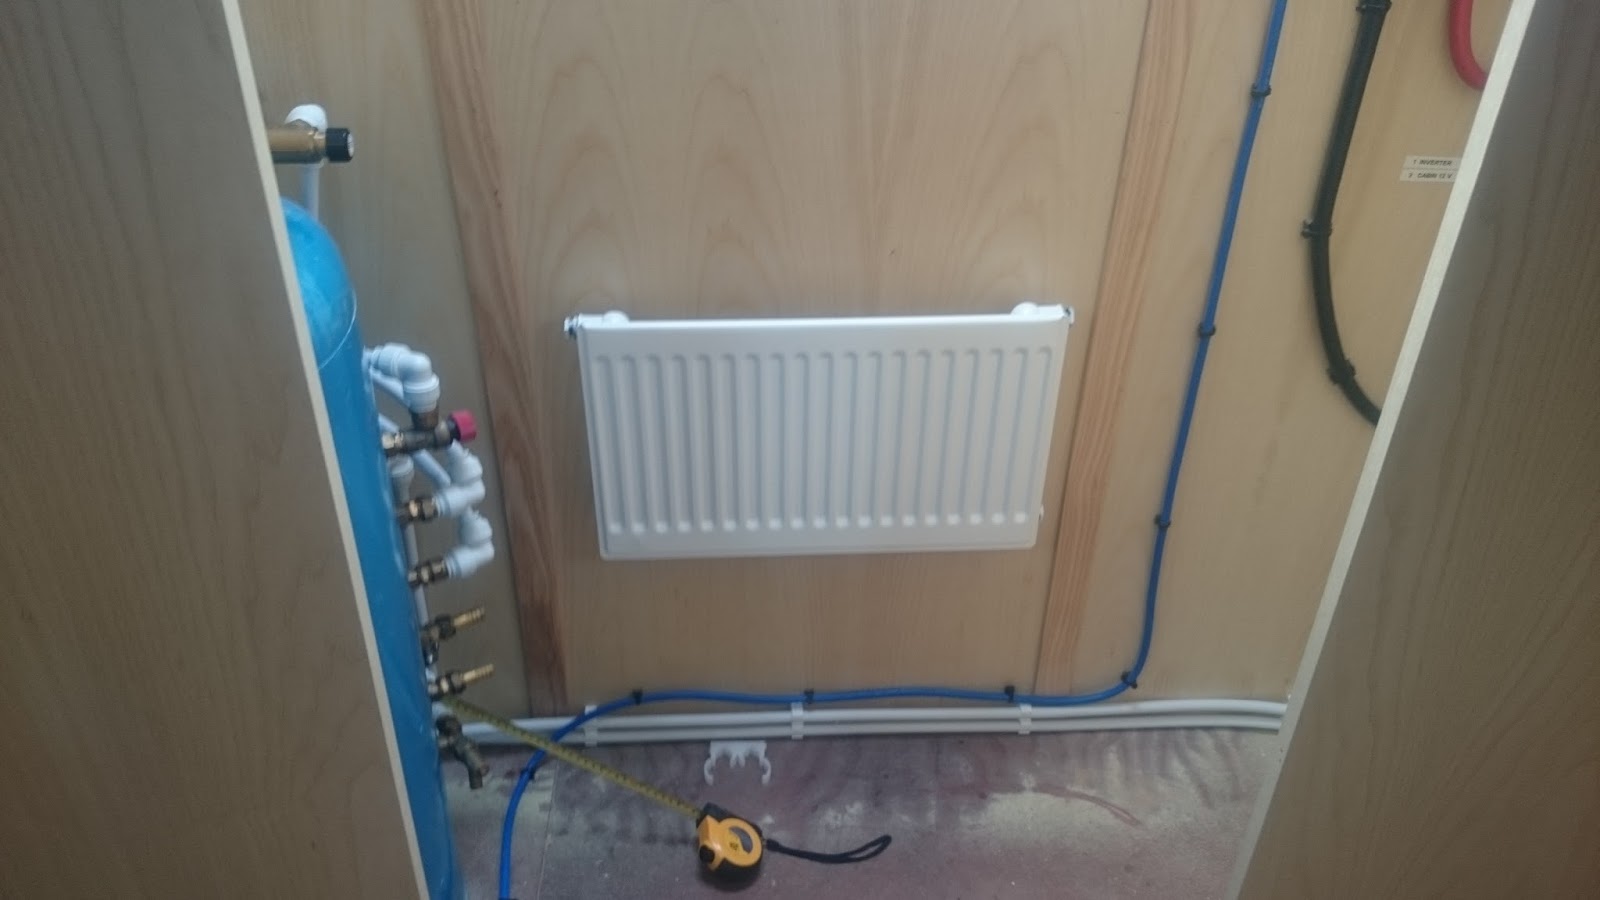
SO - Yesterday we continued fitting and piping the radiators to the boat.  You'll recall weeks ago both the rads AND the hep2o piping arrived in the post.  The " so - called" lay flat (on a roll???) piping is anything but !

Instead, it's a constant wrestling battle in a confined space.  IF you are doing the same, then I strongly suggest spending a little more and buying it in lengths of 2-3 metres... it will be much easier... I also advise on buying a better quality plastic pipe cutter than the rothenburger plastic pipe slices I'd bought off ebay...  whilst NOT totally budget, they took a bit of effort to produce a clean cut - some needed tidying up with a stanley knife.

It was very cold (sharp frost) so before we began, we started the engine, put the inverter on and turned on a little 800 watt halogen heater that usually heats the greenhouse.


The inverter showed a 24% loading which is about right and whilst you could hear the engine tone change as the alternator takes more power, the charge rate only altered from 14.6 to 14.3 v which I think is ok - I'd not be using the heater for hours on end without the engine running obviously.  

Having done the last radiator in the run first, we continued round the boat, starting in the rear dinette with the little wall rad and fin rads which will be under the bed/floor.

I'm not entirely sure the fin rad under the floor will be worth the effort but it's done and if it does turn out to be a wast of time I'll flog them on ebay to some other idiot  pioneer.

The next one in the port side run was under the hatch in the lounge - that meant enlarging the holes in the bulkheads with my multi-tool... sods law meant that where I needed to cut, the joiner had "joined" them with galvanised screws which blunted my blades.


I've been using the 2 double sealed pipe inserts  -  they seem a good idea  but be warned, they are quite a tight fit and at times I was pleased to be able to use the nylon glazing hammer I'd bought when I fitted the windows.

From the lounge I had to drill more holes to get behind the shower and into the bathroom - where we fitted the smallest heated towel rail ... NOT to heat the room (there is another radiator on the other side) but to dry towels on. 


Moving through into the bedroom, it was very tight to get the radiator low enough to be able to fit UNDER the bed and keep free the batten behind the lining to attach the bed support to.


Getting the pipes to bend around and through the front bulkhead and near the water tank was a pig.  We've ended up with 2 joins in the centre of the boat - luckily hidden behind the panel but it was very difficult to get a tight curve through the holes I cut.   It's done anyway so next to connect were the bathroom (proper) and 2nd lounge radiator.  


By now we were working in the dark again but did want to finish before calling it a day...that WOULD have happened more easily, had I not run out of "bits"...

by "bits" I mean pipe inserts...  I was SURE I'd bought enough but hadn't... SO a trip to screwfix was in order to complete the job. 

The final thing to pipe in was the calorifier - another bit of a pig, working in a tight space. I've treated it as a radiator and once that was done, passed the pipes through the bulkhead into the engine space.  It's going to be tricky to get a panel on the cupboard but that was already going to be a problem judging by the angle the boat builder had fitted it on anyway.

So they're all done.  I've NO idea if they are water tight or not... I suppose we'll find out the hard way once we get the Webasto plumbed in,

Until next time...


Wednesday, 2 November 2016

A "shorting circuit"...

The quick version is the constant "tripping" of lighting circuit 1 is now resolved!

The LONGER version follows:

Having slept on the problem, and then tried tightening up ALL the negatives on the bus-bar ( there was no improvement)...  we agreed there was nothing to be done other than call the boat builder - we left it until a little after 9 and decided that as it was such a nice morning, we'd go for a proper "first chug" in the sunshine.

Our planned destination was Fairies Hill - the place we'd originally tried to get a  mooring....  We'd never been on a boat in that direction before but knew there were a couple of massive automated locks to contend with - we'd never done an automated one before so were a little apprehensive but the sun was shining so WHAT could go wrong?


you cant see the confused face on Andy as he read , re-read and then read again the instructions...

Eventually, the lock began to empty lol.

Here are a couple of brief, dull and wobbly videos of it:


Neither of us enjoyed the lock actually...  maybe we're closet masochists but we much prefer lock-wheeling to pushing buttons.

It WAS a nice day for a chug through familiar (walking) territory


As it happens though, the 2nd lock was out of order and although CRT were in attendance, it would be 30-45 mins until it was back on line so we turned in the approach and headed back home to get on with jobs.

During the chug back I called the boat builder to inform him about the tripping circuit and ask if someone might come out.  I was a little disappointed  when he said he'd ask Paul next week when he returns from his holiday - it's NOT the end of the world, but I'd hoped he'd send someone else ... given that he knows we're off work this week... hey ho.

ANYWAY - as it happens... for whatever reason, it occurred to me the only thing I'd NOT done was "cut the outdoor light switch wire" (I'd under ordered switches so it'd not been connected up)...  BINGO - as soon as the wire was cut, the lights would stay on.

Going outside, to investigate the 'loop' of wire I discovered it wasn't a loop at all (obvious really) but 2 BARE ends that "someone" (well intentioned I've no doubt) had pushed into the hole (thus shorting out) to 'keep them dry'...  because I'd never seen any bare wires, it hadn't occurred to me!

Anyway - it's now fine and I've put the builder out of his misery.  

When we got back, we decided to try and get some primer on...  the sun was still shining so we got a bit slapped on the front... the plan is to get it all into one shade asap but as is the way with boaty plans...  people kept coming up and chatting so things got put on hold  - and by the time we could start again, it was getting too cold to continue.


We'd planned to continue with it but it was raining yesterday so we ended up starting  fitting the radiators to the interior. 


I had planned to get them on the walls first and THEN do the piping but decided to do them at the same time and have begun at the end of the run... under the back steps.  

ONLY 7 more and 2 fin-rads to do...

Until next time...


Monday, 31 October 2016

Electrical problem and varnishing.

The honey moon is over it seems... well not really but thanks to the clocks going back, yesterday afternoon, we had first reason to put the lights on to continue working...  at which point we discovered one of the circuits - the one that includes the kitchen, bathroom and front bedroom wont stay on for more than 10-15 seconds before tripping off.

I  began trouble-shooting by first turning each light switch off and resetting the mcb to see if I could isolate where the fault was.  When that didn't work, I physically removed each light "in case" one of the self switching lights was faulty... no joy there either.  Finally, I removed the mcb and swapped it with the one from the next circuit (which works fine) on the off chance it was a faulty mcb.  No - that (the swapped over one) tripped just the same once connected to the aforementioned circuit.

This can really only mean one thing - " somewhere" between the front and the back of the boat, a nail/screw has gone through a wire...  this is a pain as we've already applied 2 coats of varnish (1 Saturday and 1 yesterday morning) to the entire boat.  As far as I can see, the roof lining will have to come out - possibly even bulkheads for "them"  to try and find the problem .  I've emailed the builder last night and when it gets light out, will give them a call to ask them to send someone to take a look - they'll be narked of course... who wouldn't be but it IS new and WE'VE not yet put a screw/nail or hole in her so it's NOT our problem.   I won't be arsy of course - these things happen and I'm sure it can be sorted out... I just hope (given the dark nights) sooner rather than later.

The Morrells varnish/lacquer by the way was very easy to apply and barely darkens the ash.

Whilst the varnish was drying, we took her out for a little chug and to fill up the tank...  worryingly, it didn't take very long at all to fill - and I thought it was empty... perhaps the pump was just priming a long while the other day when I was playing with the cassette toilet rinser...  time will tell.  


She does handle quite well - any problems will be US not the boat lol  The higher seats on the rear locker give a good view so that has turned out a good decision. I do need to either replace the checker-plate engine compartment cover with buffalo board OR silence the rattle with a cut hose-pipe seal as unless you stand in the middle of it, the noise it makes gets on your nerves.

BACK to yesterday afternoon - before we discovered the fault with the lighting circuit, I fitted one of the mains  and 12 sockets in the lounge  that will be between the chairs.


I've used the ferrules cause I know you are supposed to but I CAN'T see any benefit from doing it - I mean, the are just squeezed over the twisted multi-strand wire and then held by the screw clamp in the socket anyway... I really can't see any extra safety from  them but it's not an argument I'm going to have so have just done it "right".  The usb points, 12 socket and volt meter will come in handy to keep an eye on the batteries whilst watching TV of an evening to save walking to the meter cupboard at the back.  I did slip with my multi-tool and scratch the wall a bit but I think it will sand out ok...  *note to self- SLOW DOWN*

THAT said, we've had so many cups of tea and conversations with boaters/dog-walkers and random folk over the last few days, we're probably already at half speed lol.

THIS morning, the plan is to get another coat of varnish on throughout (well ignoring the roof lining in case it does get ripped out) and then have a chug down to fairies hill where we'll turn and then come back.  The plan is to use a quiet water point and hose down 1 side of the boat going down and then then other coming back - it's pretty filthy and whilst we know we won't get it painted before winter sets in, we might get another coat of primer on... possibly an undercoat for her to over-winter in.

Until next time...


Saturday, 29 October 2016

Post delivery slump...

Thanks everyone for your good wishes - here, on cwf and thunderboat... it was good to know so many folk were pleased  and excited for us.

Adrenaline is a funny thing.

Thursday was a manic blur...in slow motion if you follow.  I was feeling quite sick from the moment I got up.

I'd been concerned beforehand about lots of things and on the day, everything was handled by everyone else - the best money we've ever spent.  The haulier was calm beyond belief (and reversed down the lane as if he was driving a mini)... everyone knew what they were doing and Edd coordinated it very professionally... another example of NOT judging books by their covers!

We drank a couple of bottles of Champagne when we got home (one very kindly given by Andy's sister) and tried to relax.

That didn't happen - it appears that when you drink after an adrenaline fuelled day whilst taking duluxetine, your brain goings into over drive.... to the point where you can't sleep at all.... I now know this and will not repeat that mistake lol

AS a result, yesterday was a slow and painful day - wandering around the boat feeling a bit bewildered at the enormity of it all.  So many jobs to do and not knowing what order to do them in... and as a result, not a lot got done.  On the plus side, we did have a few nice chats with new boaty neighbours and they seem a smashing bunch....  even the one who asked Andy if I was his Dad!!!

No offence was meant of course and everyone is being most welcoming and friendly.

From a progress point of view, I fitted a few extra bolts to the front doors and side hatches (they only had 1 on each so now we've got 3 .  I also cut a few sheets of the wood from from 4 to 2ft wide to make handling them around the boat easier... I also tested water pump, bilge and shower pumps - *note to self today we need to fill the tank as the test amount of water is now gone*.

I also attached the anchor and front and rear buttons...  that was enough for one dazed and bemused day.    LACQUERING is the plan today.


Until next time.


Thursday, 27 October 2016

The Launch

Good evening,

Please excuse the typos as I'm a little squiffy - well actually, I'm a lot squiffy ... we've been drinking  since we got home from the launch and drinking on an empty head, is NEVER a good idea!

Considering the potential for problems, today has gone remarkably well... I don't know what you were all worrying about ;-)

I was up from about 4 - unable to sleep... fretting about everything...

ALL a waste of time and effort - I couldn't help it of course but a complete waste of emotion now.

To bring you up to speed, we signed our wills at 9.30 and were home well before 10.  by 10.02, I ran out of patience and phoned the haulier to see how things were going.

He confirmed his son was scheduled to collect the boat at 10 from the boat yard.  This had come as a bit of a shock (apparently) to the yard as they thought it was a pm collection... and had just blacked it!!!

OK - so it won't be cured, but it looks prettier than before.  No matter, we plan to do it properly in the spring anyway.

We took various photos and videos which will follow, but I DO want to say a public thank you to the following:

Chris and the gang and Lymm boat sales... they've managed to stick to schedule (actually - beat the original 10 month deadline)...

Richard Dempster (the haulier) and his son Kevin, who (despite having been hospitalised only the week before) who did exactly what was expected with no fuss and TOTAL calm.

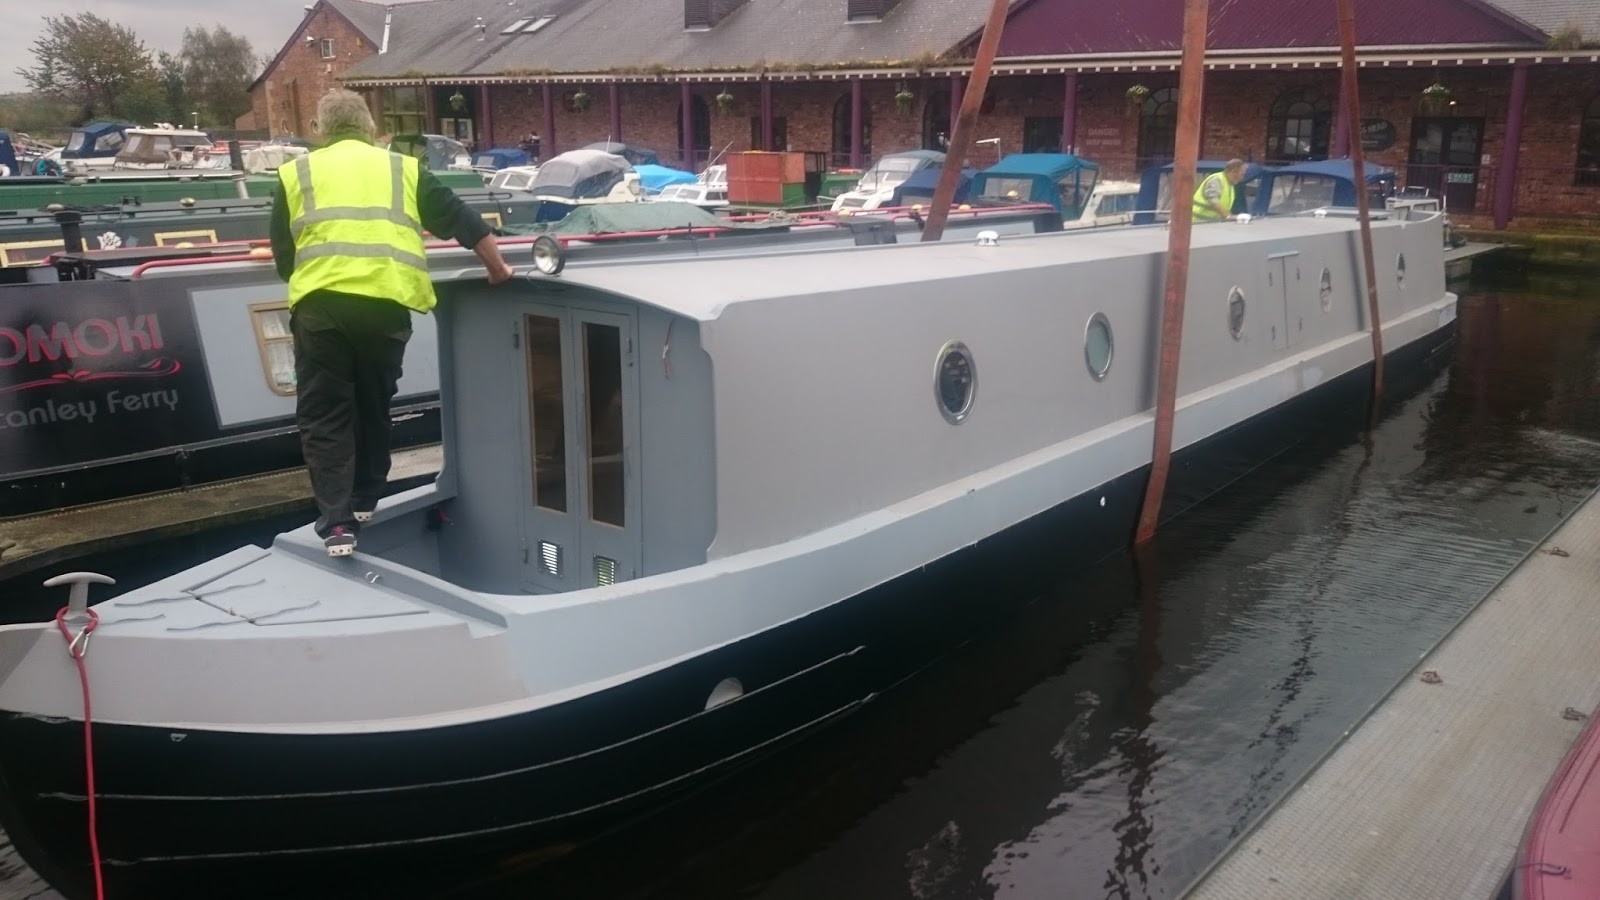
Edd Blaze and Jools at Stanley Marina for organising a first class crane lift AND bow hauling the boat to the diesel point.

EVERYONE -  just did their bit with no fuss, hassle or problems!  I tipped them all and really do appreciate the effort they put in to "just another day the office"... for them!

Only the wind was a problem - but luckily not during the lift... only during our first chug over the Stanley Ferry aqueduct - I nearly t-boned some moored boats (the water tank being empty and the wind blowing a hoolie mid turn)...

Anyway - we made it safely onto the mooring.... where she's spending her first night alone - we've come home to drink champagne and "crash" after an adrenaline fuelled


day.

SO - here are the photos and videos... probably not in any real order but folks we have a boat and it floats!


Until next time...


Wednesday, 26 October 2016

1 more sleep...

Well, today I've had the final call confirming everything is happening tomorrow... the boat will be lifted onto the truck "sometime" in the  morning... the truck will arrive "sometime" and the crane will lift it off into the water "sometime" - how lovely and precise... .not in the least bit vague and difficult for someone who likes to be organised.

Apparently I'll get used to this vagueness.  I hope so.

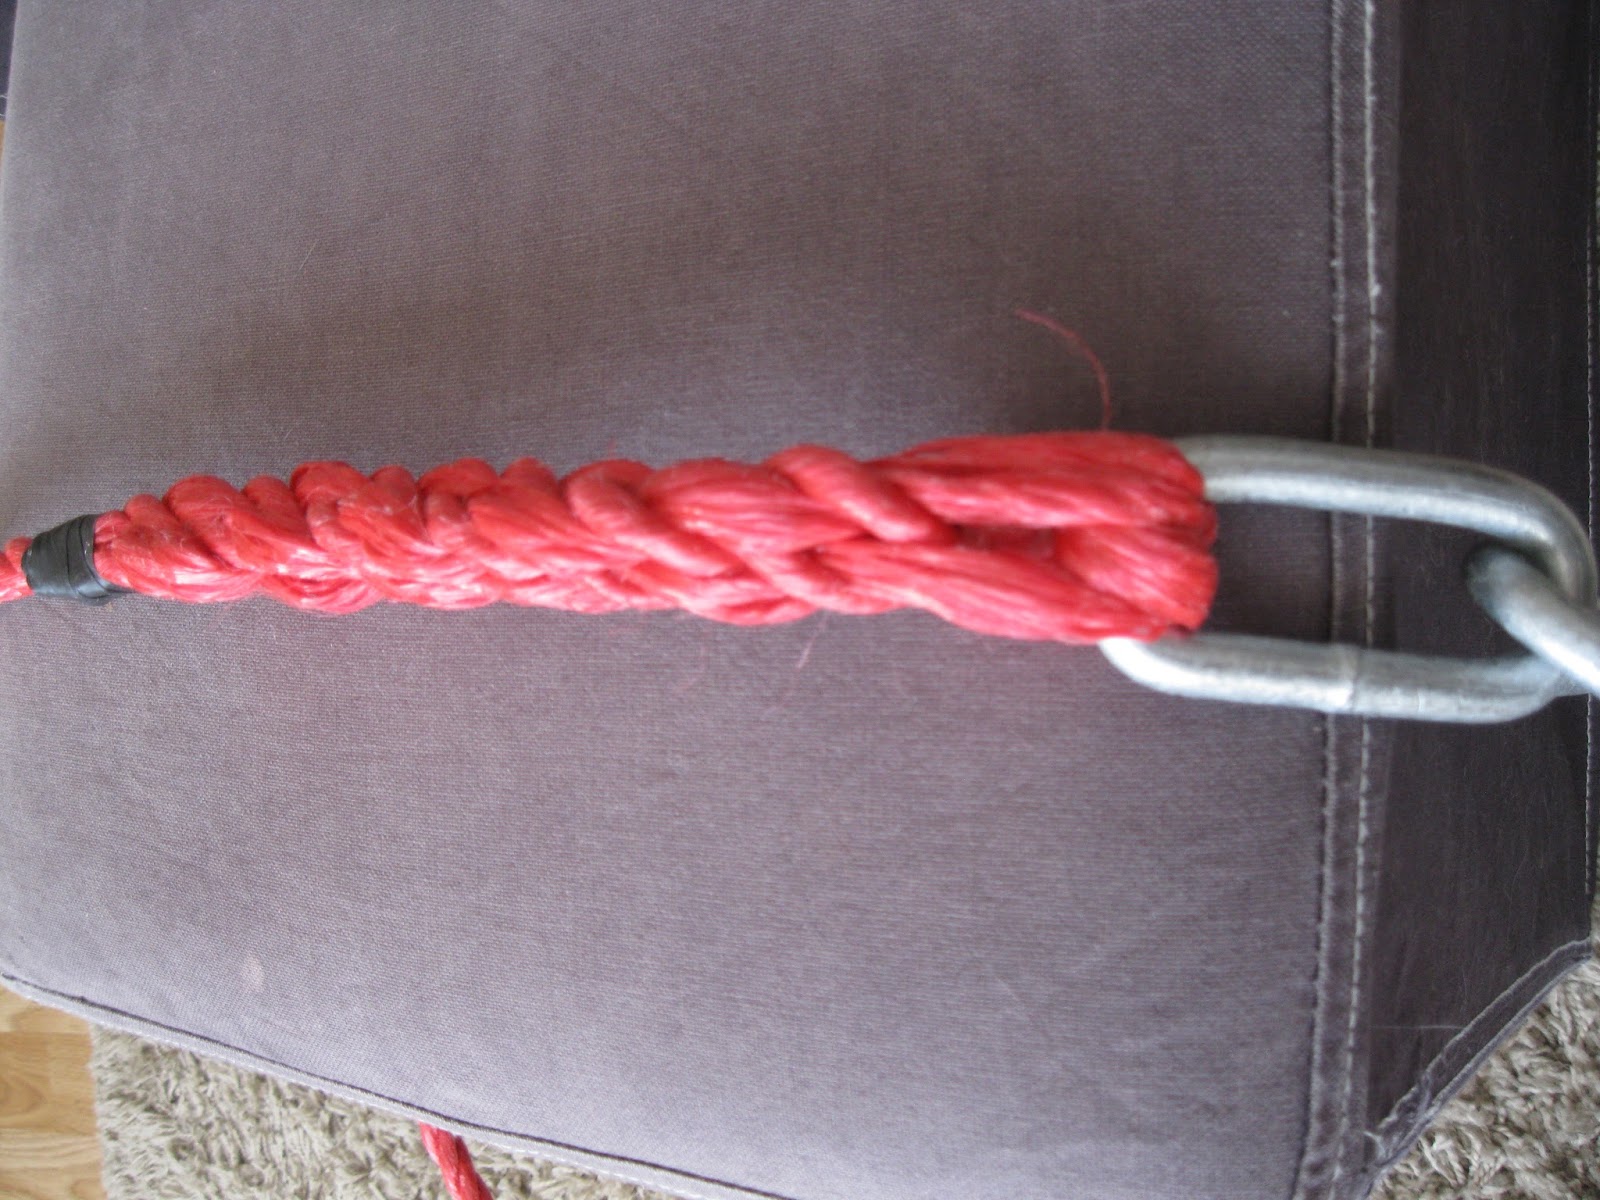
I've finally managed to get the hang of the rope splicing/tucking bit...


The anchor one doesn't look as neat I'll grant you but by the time I'd done the side fender thingys' I was more into the swing of it...  I've been looking around trying to find things that need a loop on the end lol.

In the post today came a few more cordless additions to my tool kit - usually I buy makita but at Christmas I bought a cheaper ebrauer drill from screwfix and have been quite impressed with it... SO yesterday, I added a cordless angle-grinder, circular saw and jigsaw to my kit - they all use the same batteries and now I have 4 of them (and 2 chargers) so I can leave one on the boat and one in the house.

The angle grinder will be used tomorrow to shorten the chain for the front and rear buttons.


I THINK we're all set...

 I've:

Paid the boat builder the balance,

Tipped the joiner,

Paid the crane man,

Have the cash for the haulier,

Licensed, registered and insured the boat,

Bought the "crt Key",

Filled 2 gerry cans with diesel,

Sorted out chains and d-shackles for the buttons,

Got the ropes ready,

Fitted the wooden handle into the tiller bar,

Got a hose-pipe and connectors,

Got the side fenders ready,

Got the windlasses out of the attic along with the fire-extinguishers (just in case) and 101 other things!

After work tonight, I also went up to the mooring and asked Mick and Claire (on the boats either side of where we are fitting in), to shuffle up a bit - offering to do it for them tomorrow if they cant be arsed tonight... I hope they DO it themselves though.

Next on the list is a good nights sleep... I wonder what the chance of that one is?

Watch this space !

Until next time...